
Ladybug Cupcakes
- 1½ cups granulated sugar
- ¾ cup (1½ sticks) unsalted butter, softened
- 3 eggs, room temperature
- 2 cups all-purpose flour
- ¾ cup Hershey’s dark unsweetened cocoa powder
- 1 teaspoon baking powder
- 1 teaspoon baking soda
- ¼ teaspoon salt
- 2 teaspoons pure vanilla extract
- 1 cup buttermilk
- Set the oven to 350°F.
- Grease a cupcake tray or place liners in it.
- In a medium-sized bowl, cream together butter and sugar until light and airy using an electric mixer.
- Incorporate the eggs one by one, mixing until well combined.
- Add the vanilla extract and set aside.
- In a separate bowl, sift the flour, cocoa powder, baking soda, baking powder, and salt together.
- Combine half of the dry ingredients with the creamed mixture, mixing until just blended (avoid overmixing).
- Mix in half the buttermilk until incorporated.
- Repeat the previous two steps with the remaining dry ingredients and buttermilk.
- Spoon the batter into the liners until they are three-quarters full.
- Bake for 15 to 17 minutes, or until a toothpick placed in the center comes out clean.
- Allow to cool in the tray for 5 minutes.
- Transfer the cupcakes to a wire rack to cool completely.
- Frost with icing once the cupcakes are fully cooled.
To achieve the best piping results, prepare a sturdy homemade icing that can hold its shape. Here’s a straightforward recipe:
- 1 cup (2 sticks) unsalted butter
- 3 cups sifted powdered sugar
- ¼ teaspoon salt
- 1 tablespoon vanilla extract
- 2 tablespoons cold milk
- Green food coloring gel
- Cream the butter in a mixing bowl.
- With the electric mixer on low, gradually add half of the powdered sugar until blended.
- Incorporate the remaining sugar and mix at medium speed until smooth.
- Add green gel coloring until you achieve your desired shade of dark green.
- NOTE: To thin the icing, incorporate 1 tablespoon of milk; to thicken, add 1 tablespoon of powdered sugar.
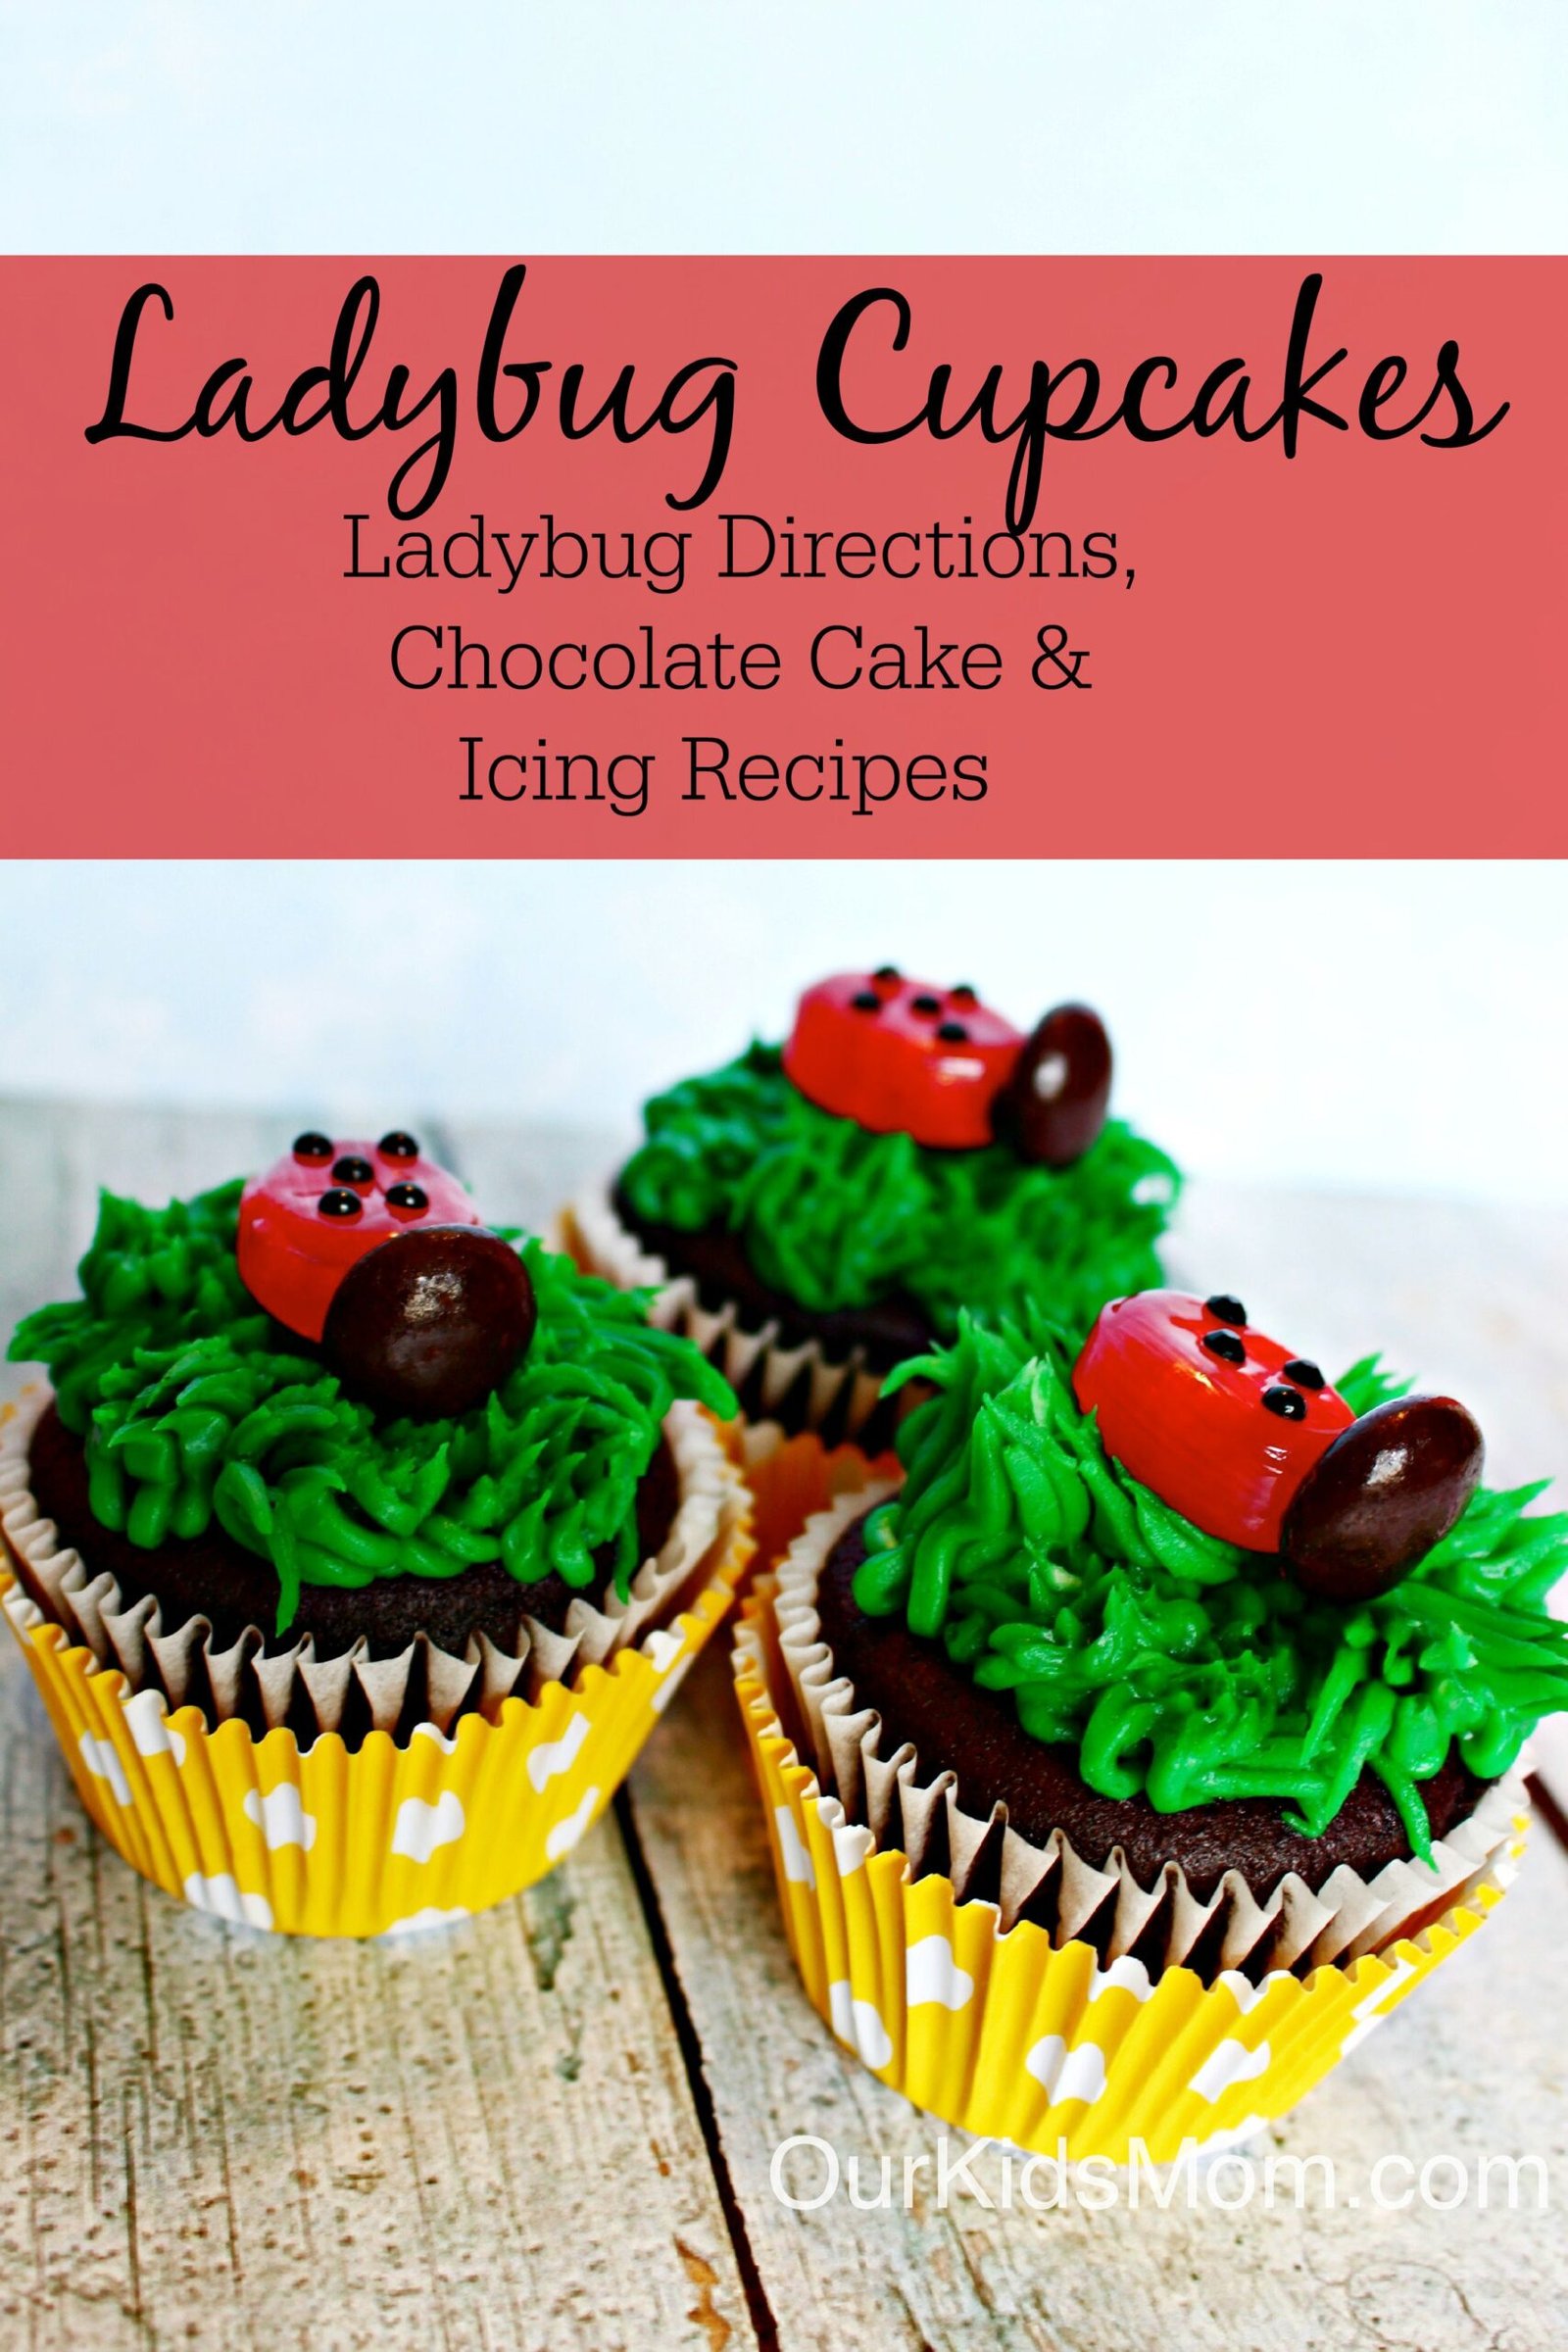
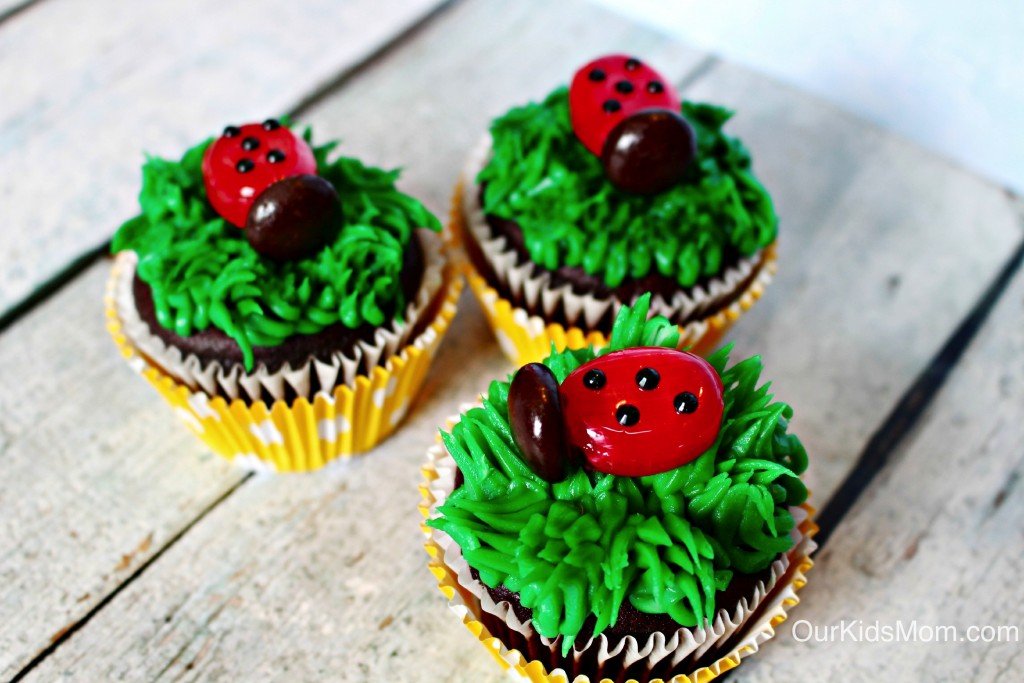
HOW TO CREATE ‘GRASS’ ICING ON CUPCAKES
1. Fill a piping bag with green icing, using a Wilton #233 tip.
2. Maintain the bag upright and gently squeeze to form a blade of grass.
3. When you see about a half-inch of icing, gently pull upwards and away to finish the strand, stopping the pressure before removing the tip.
4. Ensure that the strands cluster closely so that none of the cupcake is visible.
5. NOTE: For an organic look, you can adjust the tip slightly as you pull.
6. Visit Wilton’s website HERE for a helpful video tutorial, if necessary.
LADYBUG ASSEMBLY INGREDIENTS:
– Strawberry candies
– Junior Mints
– Mini black icing tube
Feel free to share your thoughts on these ideas or additional tips if you have any!
Comments